How Can We Help?
Search for answers or browse about Sintel Forms.
-
About Sintel Forms
-
Getting Started
-
Product Updates
-
Settings
-
Layout
- About Layout
- Adding and Editing Linked List items using Inline, Dialog & Sintel Forms Embedded
- Adding Fields
- Creating Calculated Fields & using formulas
- Default values & custom values
- Field and Section Validation
- Linked Libraries-Using a Document/Picture Library
- Linked Lists-How to add attachments
- Sections - Tab order
- Setting field properties within a Linked List
- Using a Linked List
- Form Header and Footer
-
Workflow
-
Logic
-
Reminders
-
Basic Customisation
-
Advanced Customisation
-
FAQs
- FAQs
- Activating Sintel Forms on newly created tenants
- Lists and columns used by Sintel Forms
- Support and Training
- Track the usage of Sintel Forms
- Differences between the Cloud and On-Prem Versions of Sintel Forms
- Permissions used by Sintel Forms
- Permissions required to use the Sintel Forms Designer
- SharePoint Add-Ins are retiring what can you do
-
How To Guides
- Add a button that opens the attachment panel
- Automatically add linked items or files
- Change the layout of Choice Fields
- Configure a cascading drop-down
- Configure Printing Options
- Debugging your forms
- Embedded Action Buttons
- Export a form template
- How to complete a form action with Power Automate
- Import a form template
- Lookup Columns: Control the sort order
- Lookup Columns: Retrieve additional columns from Lookup List
- Make Attachments Mandatory
- Set & clear field values using rules
- Share a Form
- Track the usage of Sintel Forms
- Transferring your license to another tenant
- Use Sintel Embedded Mode on a linked list
- Use a Rule to check if third party cookies are enabled
- Customising Send-From Address for Sintel Apps Emails
- Show all articles ( 5 ) Collapse Articles
-
Widgets
-
Noteworthy Features
-
Troubleshooting
- The redirect URL specified in the request does not match
- Everything is fine but we had a small problem getting your license
- "401 Unauthorized" error during form data save
- "500 internal server error" on form opening
- Activating Sintel Forms on newly created tenants
- Ad blockers and Privacy Extensions
- Attachments option missing in Sintel Forms
- Changing the Content Approval settings of a list can cause an issue with Sintel Forms
- Enabling third-party cookies
- Handling the list view threshold for the Workflow and Conversations features
- No actions appearing in the actions menu
- Sintel Forms doesn't appear to be applied to a list
- Sintel Forms not available in the ribbon menu
- Sintel Forms Save Process
- Site naming and Sintel Forms
- The remote server returned an error: (401) Unauthorized when importing a form template
- Workflow emails containing incorrect links to forms
- Workflow emails not being received by distribution lists or mail-enabled security groups
- Workflow emails not being received by SharePoint group members
- Data load error: Connection to SharePoint has been lost. Please reload the page.
- Data save error: Access denied. You do not have permission to perform this action or access this resource
- Email address of a Shared Mailbox not recognised by Sintel Forms
- Add a Customized behavior for Sintel Forms instead of enabling third-party cookies
- Export to PDF not working on SharePoint Subscription Edition
- "404 FILE NOT FOUND" when attempting to open a new form or existing form
- Show all articles ( 10 ) Collapse Articles
-
Code Samples
-
Sintel General Info
Activating Sintel Forms on newly created tenants
Posted
Updated
ByEoin McMahon
You are here:
0 out of 5 stars
| 5 Stars | 0% | |
| 4 Stars | 0% | |
| 3 Stars | 0% | |
| 2 Stars | 0% | |
| 1 Stars | 0% |
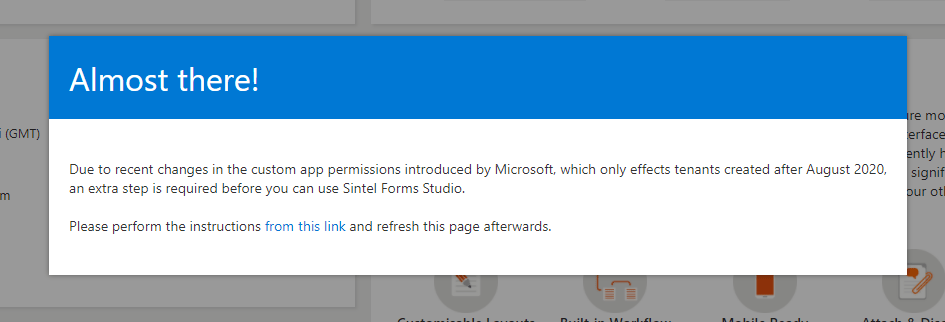
For SharePoint tenants created after August 2020 it may be necessary to perform one extra activation step in order to use Sintel Forms. If that is the case, you will receive the following screen:

As described in this thread on Microsoft’s Q&A section, a SharePoint administrator needs to perform the following steps:
- Make sure that SharePoint Management Shell is installed
- If it’s installed, make sure that it is up-to-date (using the Update-module cmdlet)
- Connect to the tenant using the Connect-SPOService cmdlet
- Execute the following code: Set-SPOTenant -DisableCustomAppAuthentication $false
- Wait a few minutes for the changes to be applied to the tenant
Was this article helpful?
0 out of 5 stars
| 5 Stars | 0% | |
| 4 Stars | 0% | |
| 3 Stars | 0% | |
| 2 Stars | 0% | |
| 1 Stars | 0% |
Table of Contents
