Search for answers or browse about Sintel Forms.
-
About Sintel Forms
-
Getting Started
-
Product Updates
-
Settings
-
Layout
- About Layout
- Adding and Editing Linked List items using Inline, Dialog & Sintel Forms Embedded
- Adding Fields
- Creating Calculated Fields & using formulas
- Default values & custom values
- Field and Section Validation
- Linked Libraries-Using a Document/Picture Library
- Linked Lists-How to add attachments
- Sections - Tab order
- Setting field properties within a Linked List
- Using a Linked List
- Form Header and Footer
-
Workflow
-
Logic
-
Reminders
-
Basic Customisation
-
Advanced Customisation
-
FAQs
- FAQs
- Activating Sintel Forms on newly created tenants
- Lists and columns used by Sintel Forms
- Support and Training
- Track the usage of Sintel Forms
- Differences between the Cloud and On-Prem Versions of Sintel Forms
- Permissions used by Sintel Forms
- Permissions required to use the Sintel Forms Designer
- SharePoint Add-Ins are retiring what can you do
-
How To Guides
- Add a button that opens the attachment panel
- Automatically add linked items or files
- Change the layout of Choice Fields
- Configure a cascading drop-down
- Configure Printing Options
- Debugging your forms
- Embedded Action Buttons
- Export a form template
- How to complete a form action with Power Automate
- Import a form template
- Lookup Columns: Control the sort order
- Lookup Columns: Retrieve additional columns from Lookup List
- Make Attachments Mandatory
- Set & clear field values using rules
- Share a Form
- Track the usage of Sintel Forms
- Transferring your license to another tenant
- Use Sintel Embedded Mode on a linked list
- Use a Rule to check if third party cookies are enabled
- Customising Send-From Address for Sintel Apps Emails
- Show all articles ( 5 ) Collapse Articles
-
Widgets
-
Noteworthy Features
-
Troubleshooting
- The redirect URL specified in the request does not match
- Everything is fine but we had a small problem getting your license
- "401 Unauthorized" error during form data save
- "500 internal server error" on form opening
- Activating Sintel Forms on newly created tenants
- Ad blockers and Privacy Extensions
- Attachments option missing in Sintel Forms
- Changing the Content Approval settings of a list can cause an issue with Sintel Forms
- Enabling third-party cookies
- Handling the list view threshold for the Workflow and Conversations features
- No actions appearing in the actions menu
- Sintel Forms doesn't appear to be applied to a list
- Sintel Forms not available in the ribbon menu
- Sintel Forms Save Process
- Site naming and Sintel Forms
- The remote server returned an error: (401) Unauthorized when importing a form template
- Workflow emails containing incorrect links to forms
- Workflow emails not being received by distribution lists or mail-enabled security groups
- Workflow emails not being received by SharePoint group members
- Data load error: Connection to SharePoint has been lost. Please reload the page.
- Data save error: Access denied. You do not have permission to perform this action or access this resource
- Email address of a Shared Mailbox not recognised by Sintel Forms
- Add an exception for Sintel Forms instead of enabling third-party cookies
- Export to PDF not working on SharePoint Subscription Edition
- "404 FILE NOT FOUND" when attempting to open a new form or existing form
- Show all articles ( 10 ) Collapse Articles
-
Code Samples
-
Sintel General Info
Workflow: Statuses
0 out of 5 stars
| 5 Stars | 0% | |
| 4 Stars | 0% | |
| 3 Stars | 0% | |
| 2 Stars | 0% | |
| 1 Stars | 0% |
Statuses are the states a form can be in at any point in time.
Workflows can be configured within the Workflow screen and you begin by simply clicking the ‘Add Status’ button:
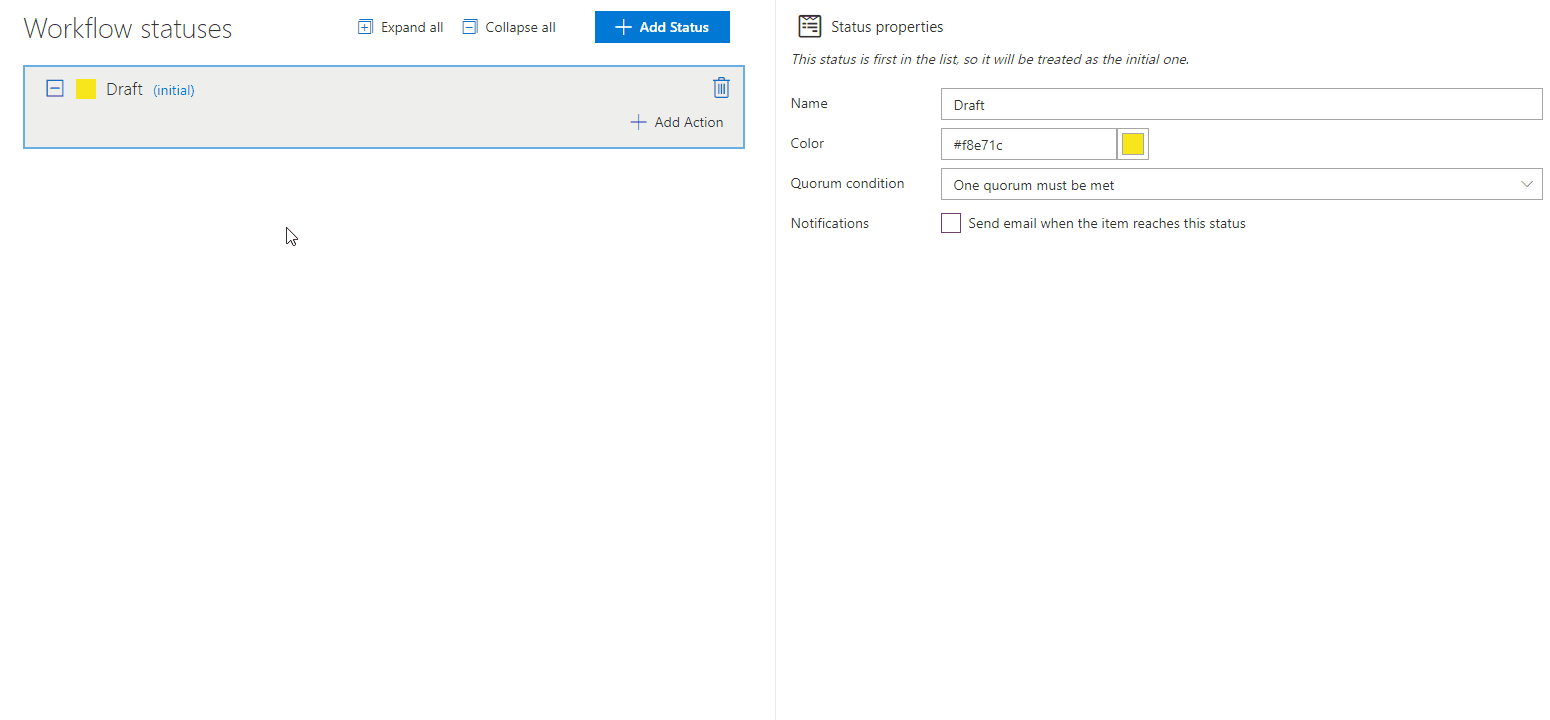
- Name
- Color (the status color will be shown in Viewer/Editor)
- Quorum condition
- Notifications (more about notifications)
To change the order of the statuses simply drag and drop them as you need.
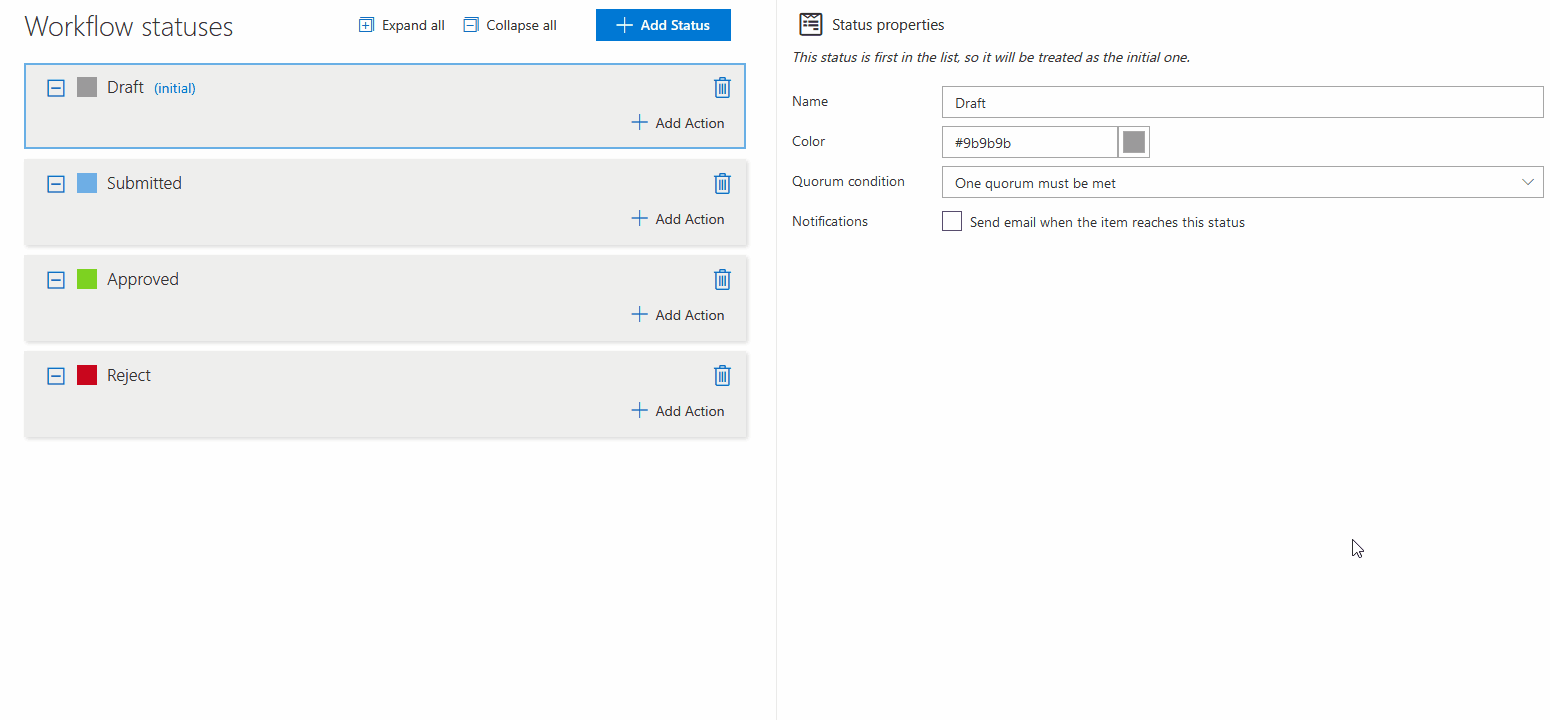
To delete a Status simply click the delete button.
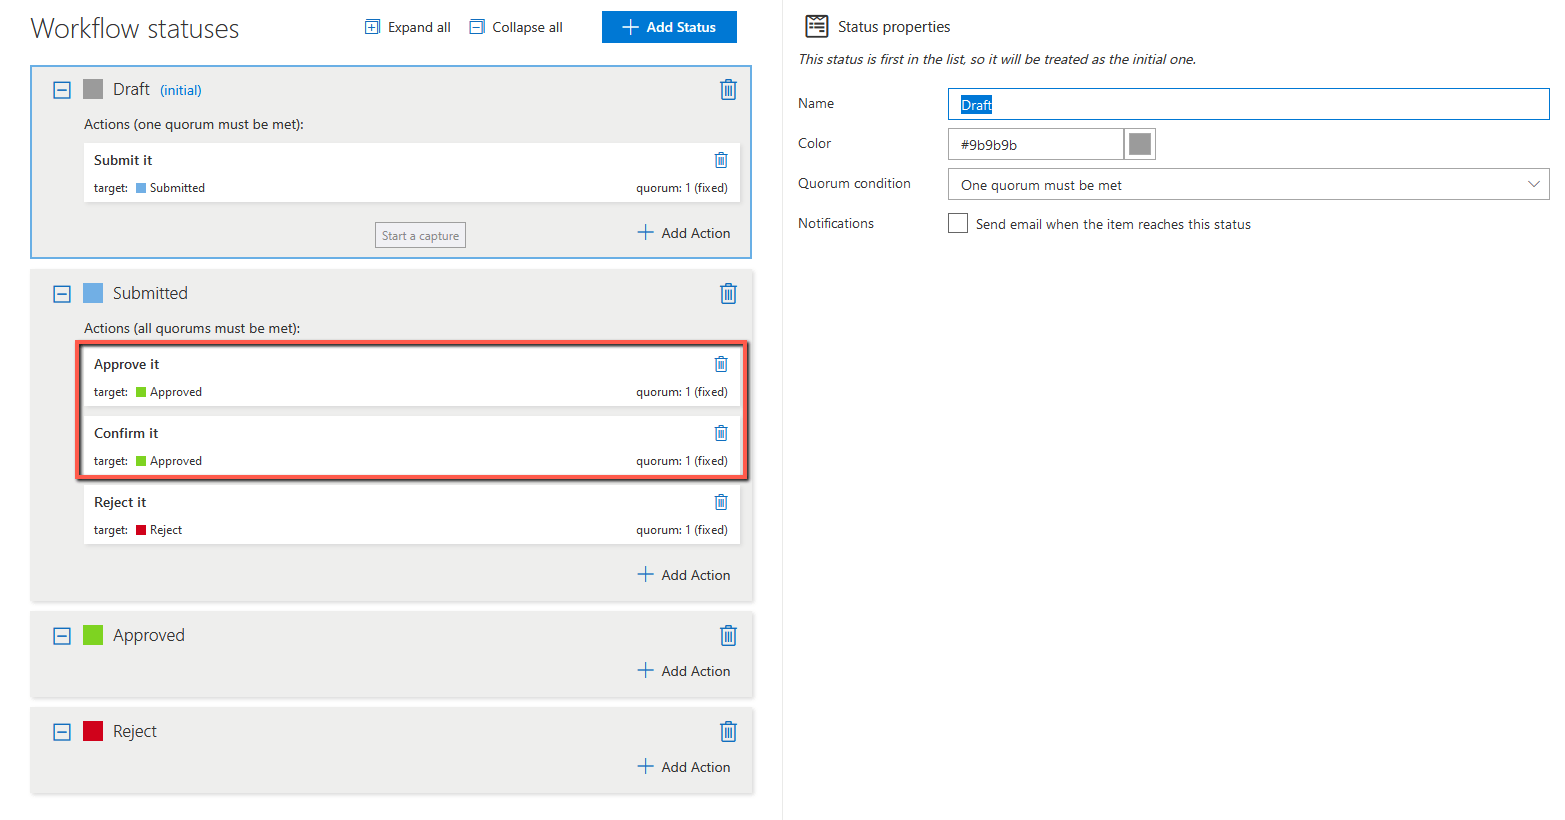
When configuring a quorum two options are available:
- One quorum must be met
- All quorums must be met
This option simply dictates many actions must be completed before a form can change its status.
Example
The Quorum condition is set to “One quorum must be met” which means:
– The form will change its status to ‘Approved’ when only one action is completed (‘Approve it’ or ‘Confirm it’) or
– will change the status to ‘Rejected’ when the ‘Reject it’ action is completed.
Alternatively, if the Quorum condition was set to “All quorums must be met” this would mean:
– The form will change its status to ‘Approved’ when all actions (leads to one status) are completed (‘Approve it’ and ‘Confirm it’) or
– will change the status to ‘Rejected’ when the ‘Reject it’ action is completed.
To set up an email visit here.
0 out of 5 stars
| 5 Stars | 0% | |
| 4 Stars | 0% | |
| 3 Stars | 0% | |
| 2 Stars | 0% | |
| 1 Stars | 0% |